Planting
Planting may sound simple enough but it is vital it is done correctly. An incorrectly planted plant can lead to rot, failed root network establishment, unsightly proud edges of the pot level if planted to shallow or skew stems. It is also key to keep a close eye on which plant is going where to ensure the plan is implemented accurately and to reduce the chance of small plants becoming lost when mulching.
Overview
Dig your hole-Most smaller plants require round holes whereas trees and shrubs require square holes.
Remove from pot- Flip pot and squeeze to remove plant from pot. Cuts may be required if pot bound. Pot bound plants may need cutting free with secateurs.
Plant into hole- Plant all plants at the correct depth, the soil level must be the same height up the stem as it was in the pot. Ensure stems are upright and not skew.
Firm in- Using your heel firm the plant in with your after planting
Watering- Water thoroughly after planting
Mulch- Mulch the bed after all plants are planted in place correctly
Removing a plant from its pot
The first challenge when planting can be removing the plant from its pot. You should always remove all plant passports, labels and elastic ties before planting as these will impede growth and form. Save all plant passports as these will be needed if a DEFRA audit is undertaken.
To get a plant out of its pot, tip upside down with one hand underneath the bottom of the pot and the other covering the top of the pot to keep any loose potting mix from falling out. Squeeze the bottom of the pot hard until you hear a cracking sound. Rotate and repeat until the plant falls freely into your other hand. Gently loosen and untangle and roots keeping the plant from leaving the pot if necessary.
Removing potbound plants from their pots
Nurseries can often leave a plant in a pot for too long, meaning roots will wrap around the drainage holes. This makes getting the plant out of its pot impossible without cutting the roots or the drainage holes with secateurs. This is known as ‘potbound’.
To remove a potbound plant from its pot, cut the base of the pot between the drainage holes to join neighbouring holes into one larger hole, going round the base to remove the bottom entirely if necessary (see image).
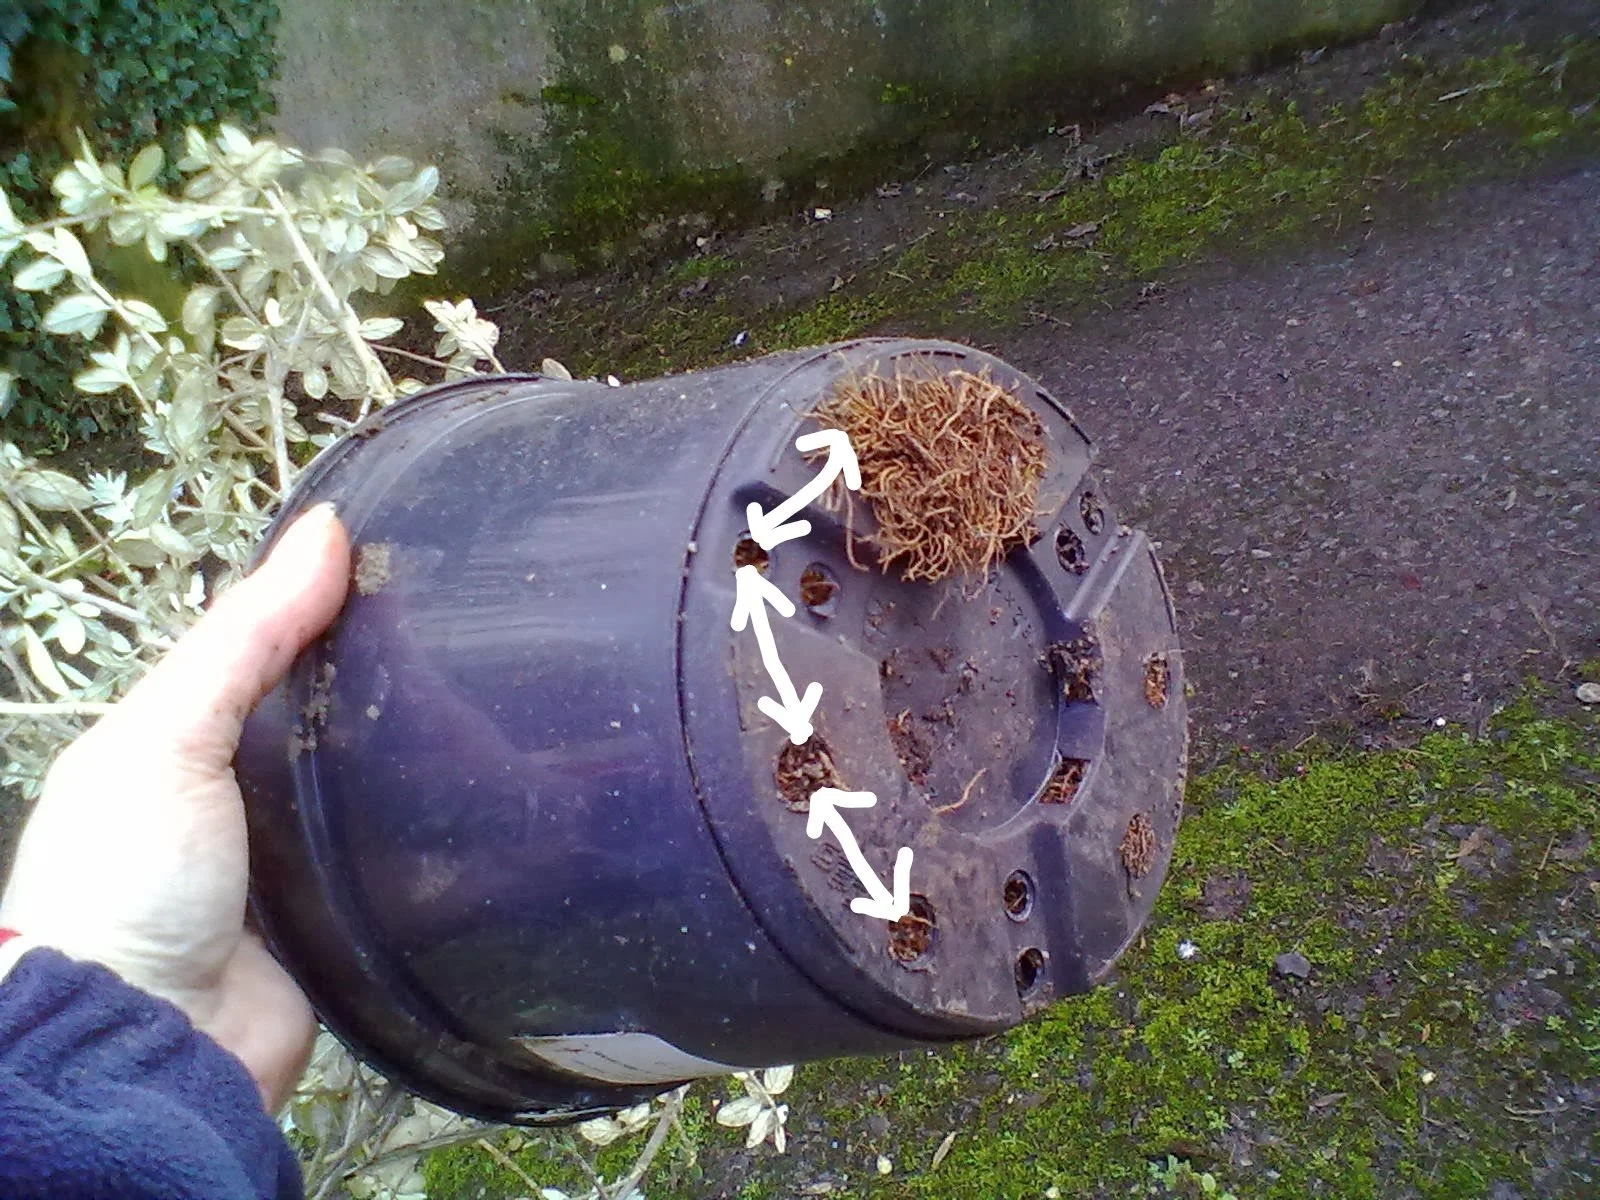
cut pot where indicated with arrows to remove the base
Untangle the roots from the base as much as possible, cutting roots may be necessary but avoid if possible. Once the potbound plant is out of the pot it is worth gently feathering out the roots to ensure they can spread freely into the ground.
Planting your plant
Dig a hole using a trowel or spade depending on the size of the plant. Generally any plant in a pot over 15cm you may find is worth using a spade. Aim to dig a hole twice as big as you expect you’ll need based off the size of the pot, you will find this will give enough space to get the plant in.
Make note of the level at which the soil surface meets the stem of the plant when it is in its pot. This is the level the soil surface sits after planting in the ground and is very important. Too low will cause the plant to rot. Too high and the edge of the pot will be visible (see image).

Planting too proud looks unnatural and leaves visual evidence of an incorrectly planted plant.
Watering
After planting, firm in with your heel then water heavily. If watering with a watering can you should take approximately five seconds of pouring or until surrounding soil is saturated.
Planting shrubs and trees
Shrubs and trees need the same techniques but with one important difference. When digging a hole for a shrub or tree a square hole is needed rather than a circular one. This is to prevent root spiralling, a problem where roots grow round laterally rather than downwards.
Post-planting mulch
After planting a layer of mulch approximaly 5cm thick will be applied to supress weeds by blocking light to the soil surface. The mulch also helps retain moisture so ensure to water first then to mulch after. The mulch should sit around the stem of the plant but leave a small gap to reduce chance of rot.
When planting in winter or when using 9cm pots plants can be easily lost below mulch if growth is small or the plant is dormant. This can kill the plant through blocking light so do make sure mulch never covers a plant.
Planting step-by-step
1- Dig hole
2- Remove plant from pot
3- Place plant in hole, the soil surface level must be the same height up the stem as it was in the pot
4- Firm in with your heel ensuring the soil surface level stays the same
5- Water thoroughly
6- Mulch